

How To Turn A Drawing Into A 3d Model
3D printing has many amazing capabilities that people can make use of, one of them is making an STL file and 3D model from just an paradigm or photograph. If y'all are wondering how to make a 3D printed object from a picture, yous are in the right identify.
Keep reading through this commodity for a detailed guide on how to create your own 3D model from just a picture.
Can You Turn a Picture Into a 3D Print?
It is possible to plough a picture into a 3D print just by inserting the JPG or PNG file into your slicer similar Cura and it will create a 3D printable file that yous can adjust, modify, and print. It's advisable to print these vertically continuing to capture the detail, and with a raft underneath to agree it in place.
I'll show you the very basic method to turn a picture into a 3D impress, though there are more detailed methods that attain meliorate results which I'll describe farther in the commodity.
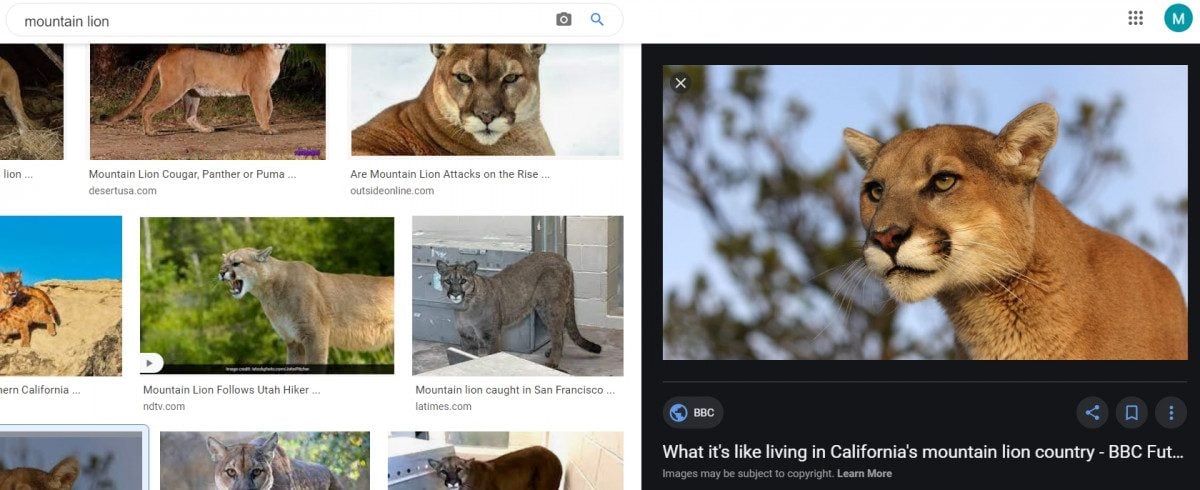
Firstly, you lot desire to find an prototype which I constitute in Google Images.
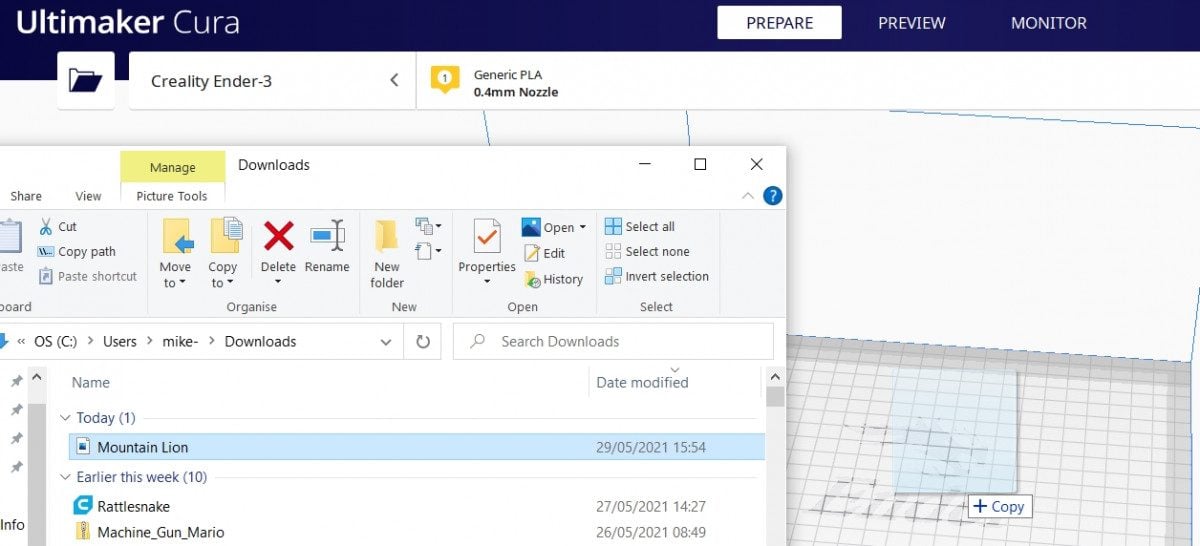
Find the epitome file in the binder yous placed it in then drag the file straight into Cura.
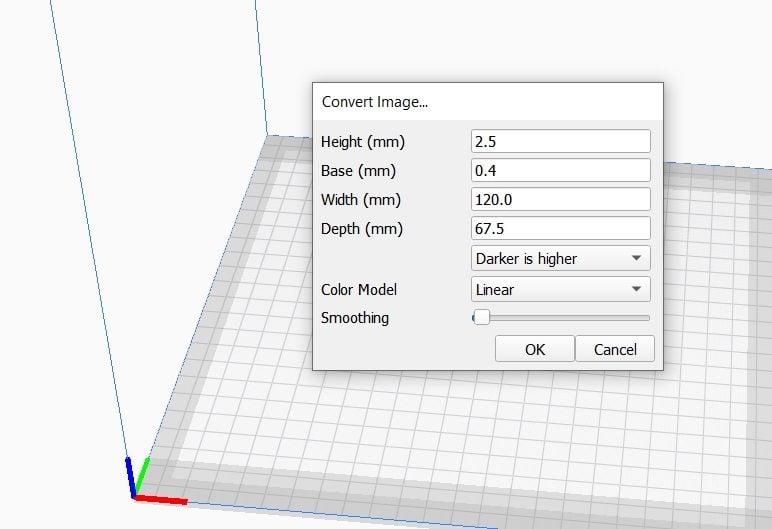
Ready the relevant inputs equally you lot wish. The defaults should work but fine but you can test these out and preview the model.
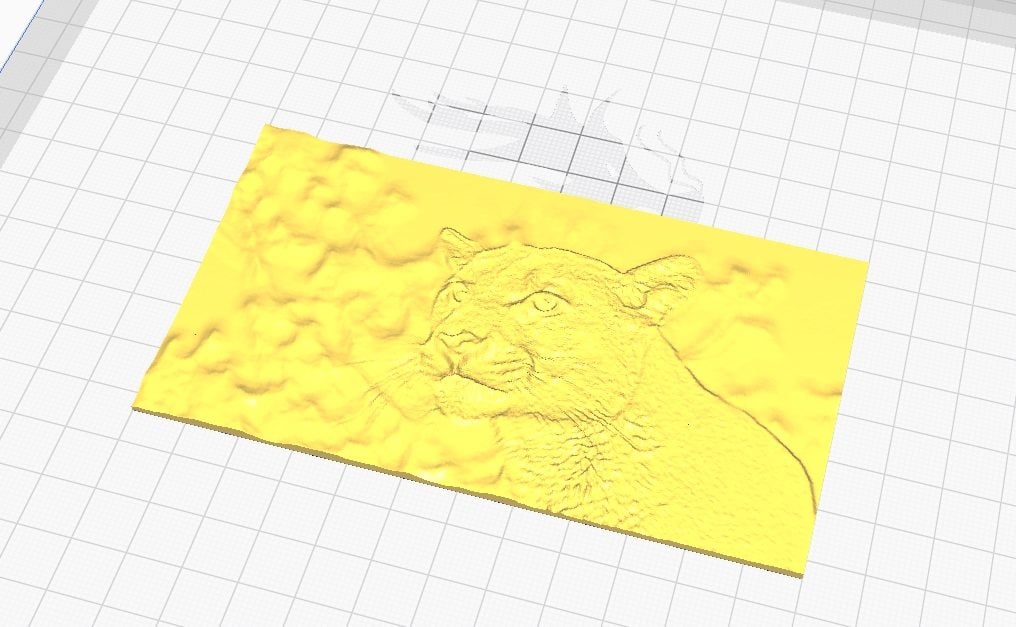
Yous'll now encounter the 3D model of the image placed on the Cura build plate.
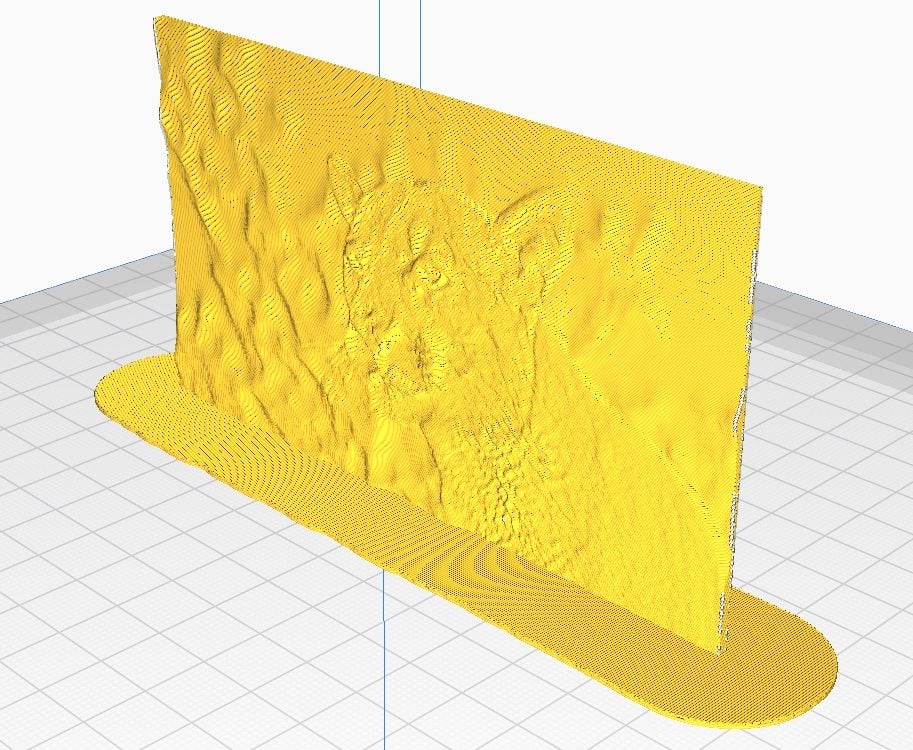
I'd recommend standing the model up vertically, too equally placing a raft to secure it in identify equally shown in the Preview mode in the moving-picture show below. When it comes to 3D press and orientations, you lot go more accurateness in the Z-direction every bit opposed to the XY direction.
This is why it's best to 3D print statues and busts where the details are created in line with top rather than horizontally.
Here is the final product printed on an Ender three – 2 hours and 31 minutes, nineteen grams of white PLA filament.
How to Make an STL File From an Image – Catechumen JPG to STL
To make an STL file from an image, you can apply a costless online tool like ImagetoSTL or AnyConv which processes JPG or PNG files to STL mesh files that tin can be 3D printed. Once you have the STL file, you can edit and change the file earlier slicing it for your 3D printer.
Another technique y'all can exercise to make a more detailed 3D impress which has the outlines of your model is to make a .svg file in the exact shape you lot desire to create, edit the file in a design software like TinkerCAD, then salvage it every bit a .stl file which you can 3D print.
This .svg is basically a vector graphic or an outline of a picture. You can either download a common vector graphic model online or create your own model by drawing it on a piece of software like Inkscape or Illustrator.
Another cool method to turn a unmarried image to a 3D model is to use a free online tool similar convertio which processes images to an SVG format file.
Once you take the outline, you tin suit the measurements in TinkerCAD to how high y'all desire it, to recess or extend parts and plenty more.
Afterwards y'all accept done your modifications, safety it every bit an STL file and piece it as usual in your slicer. You can then transfer it to your 3D printer via SD carte du jour every bit usual and hit print.
The printer should then turn your film into a 3D print. Hither's an example of a user converting SVG files to STL files with the help of TinkerCAD.
Using resources and software programs that you lot can discover online for free, you can convert an image in JPG format to an STL file.
Starting time, yous need the image itself. You can either download one from the internet or create one yourself, due east.k. creating a second floor plan using AutoCAD software.
Next, search for an online converter on Google, e.g. AnyConv. Upload the JPG file and press convert. Later it is washed converting, download the subsequent STL file.
While you can direct export this file to a suitable slicer to obtain a gcode file that you tin can print out, information technology is advisable to edit the file.
Y'all can either utilize i two popular software programs, Fusion 360 or TinkerCAD to edit the STL file. If your epitome is less complex and has basic shapes, and so I'd propose that you go for TinkerCAD. For more than circuitous images, Autodesk's Fusion 360 will be more suitable.
Import the file to the relevant software and brainstorm editing the image. This basically involves a couple of things including, removing parts of the object that you wouldn't want to be printed out, irresolute the thickness of the object, and checking all the dimensions.
Next, you'll need to calibration downward the object to a size that can exist printed on your 3D printer. This size will depend on the dimensions of your 3D printer.
Finally, save the edited blueprint of your object equally an STL file that you can slice and print out.
I found this YouTube video which looks very useful when converting JPG images to STL files, and editing in Fusion 360 for the starting time time.
If you prefer using TinkerCAD instead, then this video will take yous through the whole process.
How to Make a 3D Model From a Photo – Photogrammetry
To make a 3D model from a photo using photogrammetry, you'll need a smartphone or photographic camera, your object, some good lighting, and the relevant software to put the model together. It requires taking several pictures of the model, inputting it into a photogrammetry software, and then fixing any errors.
Photogrammetry involves taking a lot of pictures of an object from all different angles and transferring them to a photogrammetry software on your computer. The software so creates a 3D image from all the images you have taken.
To showtime, you will need a camera. An ordinary smartphone photographic camera will suffice, but if you have a digital photographic camera, that will exist even improve.
You will as well need to download a photogrammetry software. There are multiple open source software that you tin download e.g. Meshroom, Autodesk Recap and Regard 3D. If you lot are a beginner, I'd recommend Meshroom or Autodesk ReCap which are pretty straightforward.
A powerful PC volition is also exist essential. These kinds of software put quite a load on your computer when creating a 3D image from photos. If yous have a computer with a GPU carte du jour that supports Nvidia, it will come up in handy.
Afterwards deciding on the object you want to turn into a 3D model, position it well on a level surface earlier yous start to take photos.
Ensure that the lighting is well-baked, for the results to plow out nicely. The photos should non have any shadows or reflective surfaces.
Snap photos of the object from all possible angles. You will also want to do some close upwards photos of the darker areas of the object to catch all the details that might non exist visible.
Go along to download the Autodesk Epitomize Pro from their website or download Meshroom for free. Set up the software you take called to download.
After setting upwards the software, drag and drop the images there. The software automatically detects the blazon of camera yous use for information technology to correctly carry out the right computations.
The software will accept some time to create the 3D model from the pictures, so you have to be patient. Afterward it is done, you lot can export the 3D model in STL format to your desired slicer.
Afterwards slicing the files, you can transfer them to a USB wink bulldoze or SD card. Input the device used to transfer to your printer and print out the 3D model of your photo.
For a more detailed caption of this process you can take a look at this YouTube video.
You can also look at the video below to get a more detailed caption of using the Autodesk ReCap Pro software to create a 3D model from photos.
There are other software applications out in that location that do similar things:
- Agisoft Photoscan
- 3DF Zephyr
- Regard3D
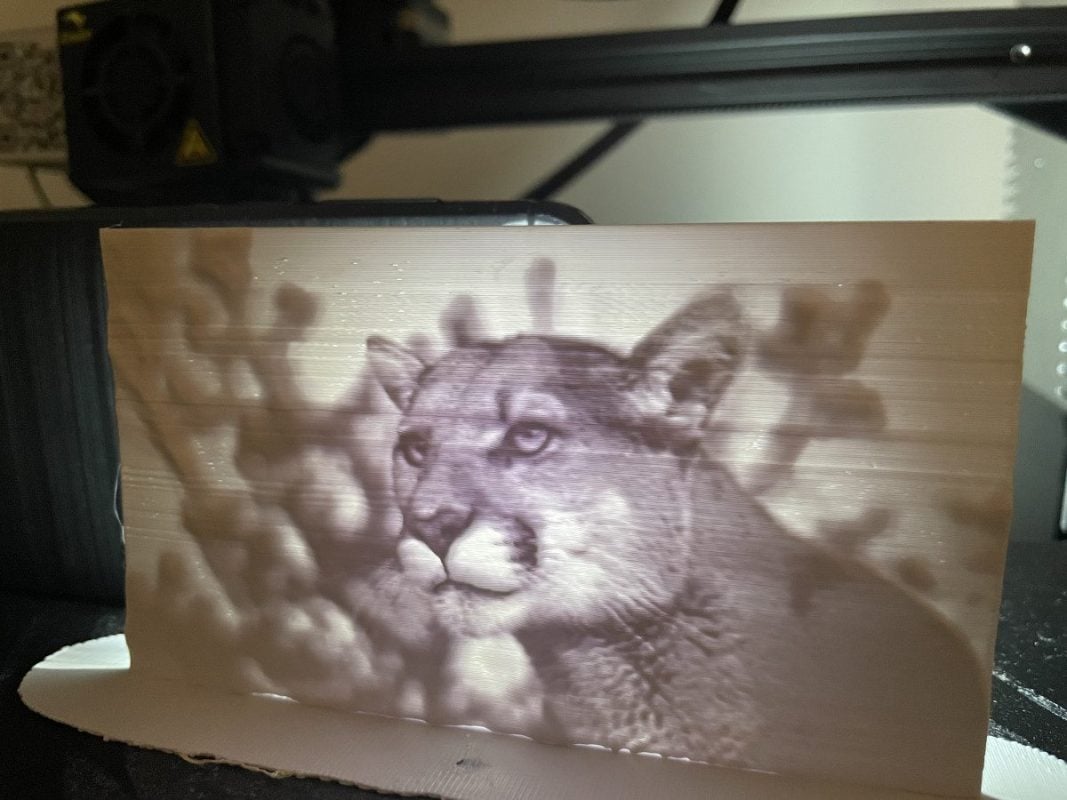
How to Make a 3D Lithophane Model From a Photograph
A lithophane is basically a molded photo that has been created by a 3D printer. You lot tin can only see the image that has been printed one time you place information technology in forepart of a light source.
Making a 3D Model lithophane from a photo is a fairly elementary procedure. First, you'll demand a photo. You can choose a family portrait you have saved on your desktop, or just download whatever other free-to-use photo online.
Use 3DP Rocks
Search for an paradigm to lithophane converter online like 3DP Rocks. Upload the photo you want to catechumen or simply elevate and driblet it to the site.
Choose the type of lithophane yous would similar the photograph to be converted to. The outer curve is mostly preferable.
Get to the settings tab of your screen and adapt accordingly for your model to turn out perfectly. The settings let you lot to adjust parameters such equally the size, thickness, curve vectors per pixel, borders, etc. of your 3D model.
For the image settings, the important thing is to put the first parameter to positive image. The other settings tin can be left as default.
Ensure that yous go back to the model and hit refresh for all the settings to be saved.
Once yous are done, download the STL file. Later on downloading it, import information technology to the slicing software you are currently using, whether information technology's Cura, Slic3r or KISSlicer.
Adjust your slicer settings and let it slice your file. Save the subsequent sliced file on your SD card or USB wink bulldoze.
Plug it to your 3D printer and hit print. The upshot will exist a nicely printed 3D lithophane model of the photo y'all chose.
Check out these video to become a pace past pace caption of this process.
Use ItsLitho
Another pop software to use is ItsLitho which is a more than modernistic, kept up to engagement, and has a lot more options.
You tin even make colored lithophanes using a special method. Check out the video below by RCLifeOn for more than details on how you can do this yourself.

Source: https://3dprinterly.com/how-to-make-an-stl-file-3d-model-from-a-photo-picture/
Posted by: stevensonnotheires.blogspot.com
0 Response to "How To Turn A Drawing Into A 3d Model"
Post a Comment